So, you want a real blog or website with a real domain name, one that doesn’t look like www.myawesomewebsite.[InsertHostnameLikeWordpressOrWixHere].com, right? Or maybe you need more control and flexibility than a what a free bloghost provides.
Awesome. You’ve come to the right place. And I’m totally going to hold your hand through the whole thing so you don’t get lost, okay? Let’s just jump right in, shall we?
Wait! Two caveats first:
- You can choose any webhost provider, but this tutorial will show you how to get started with Bluehost.
- You can choose any blogging platform you like, but this tutorial will show you how using WordPress.
OK, now let’s go already.
There are 2 steps to getting your website set up.
- Sign up with Bluehost.
- Install the free WordPress software on your newly purchased server space.
Step 1: Sign up with Bluehost
Go the Bluehost website and sign up for an account (click here to get there). Rates can start as low as $5.95 per month (sometimes even lower) and that includes a free domain and email associated with that domain. I use it for all of my of websites, installing WordPress is a snap, and they have 24/7 customer support.
When you get to the Bluehost Site, click on the “Get Started Now” button. At press time it looked like a big green thing:

Pick a Bluehost Plan
If you’re not sure which one you want, just go with Basic for now. If you know you’re going to want more than one website, go for the middle “Plus” plan. If you want a million websites, go for the “Prime” plan. That’s not true – the million websites is if you’re on the “Pro” plan.
Whatever you choose, just hit the big green “Select” button:

It will then ask you for your domain name.
Pick a Domain Name
TIP: Have a list of names in mind in case your first one is already taken.

Enter your domain name and click the blue “next” button.
This is where I have to stop because like at the airport, I can’t go past the security check-in line and wait at the gate with you. At some point, as much as I love you and care about what happens to you, I have to let you go and walk through the rest by yourself. It should be very easy and the flight attendants will take very good care of you with all the soda and pretzels you want and I will be waiting for you on the other side, OK?
At some point, Bluehost will tell you “Congratulations! You have successfully registered with us and we can’t BEGIN to tell you what an awesome experience that was. Is that a new sweater?” Or something like that.
On to Step 2…
Step 2: Install WordPress
Now that you have a Bluehost account with a domain name, you want to install WordPress on that domain. (If you have more than one website (i.e. multiple domains), you must install WordPress on each domain.)
Login into your Bluehost cPanel page by going to https://my.bluehost.com/cgi/cpanel. A cPanel page is a sort of dashboard that has all these different things you can do once you get there and installing WordPress is one of them.
Login to the Bluehost cPanel
Enter your login credentials. Below is an example using my domain, stickyreaders.com

This is what your cPAnel looks like:
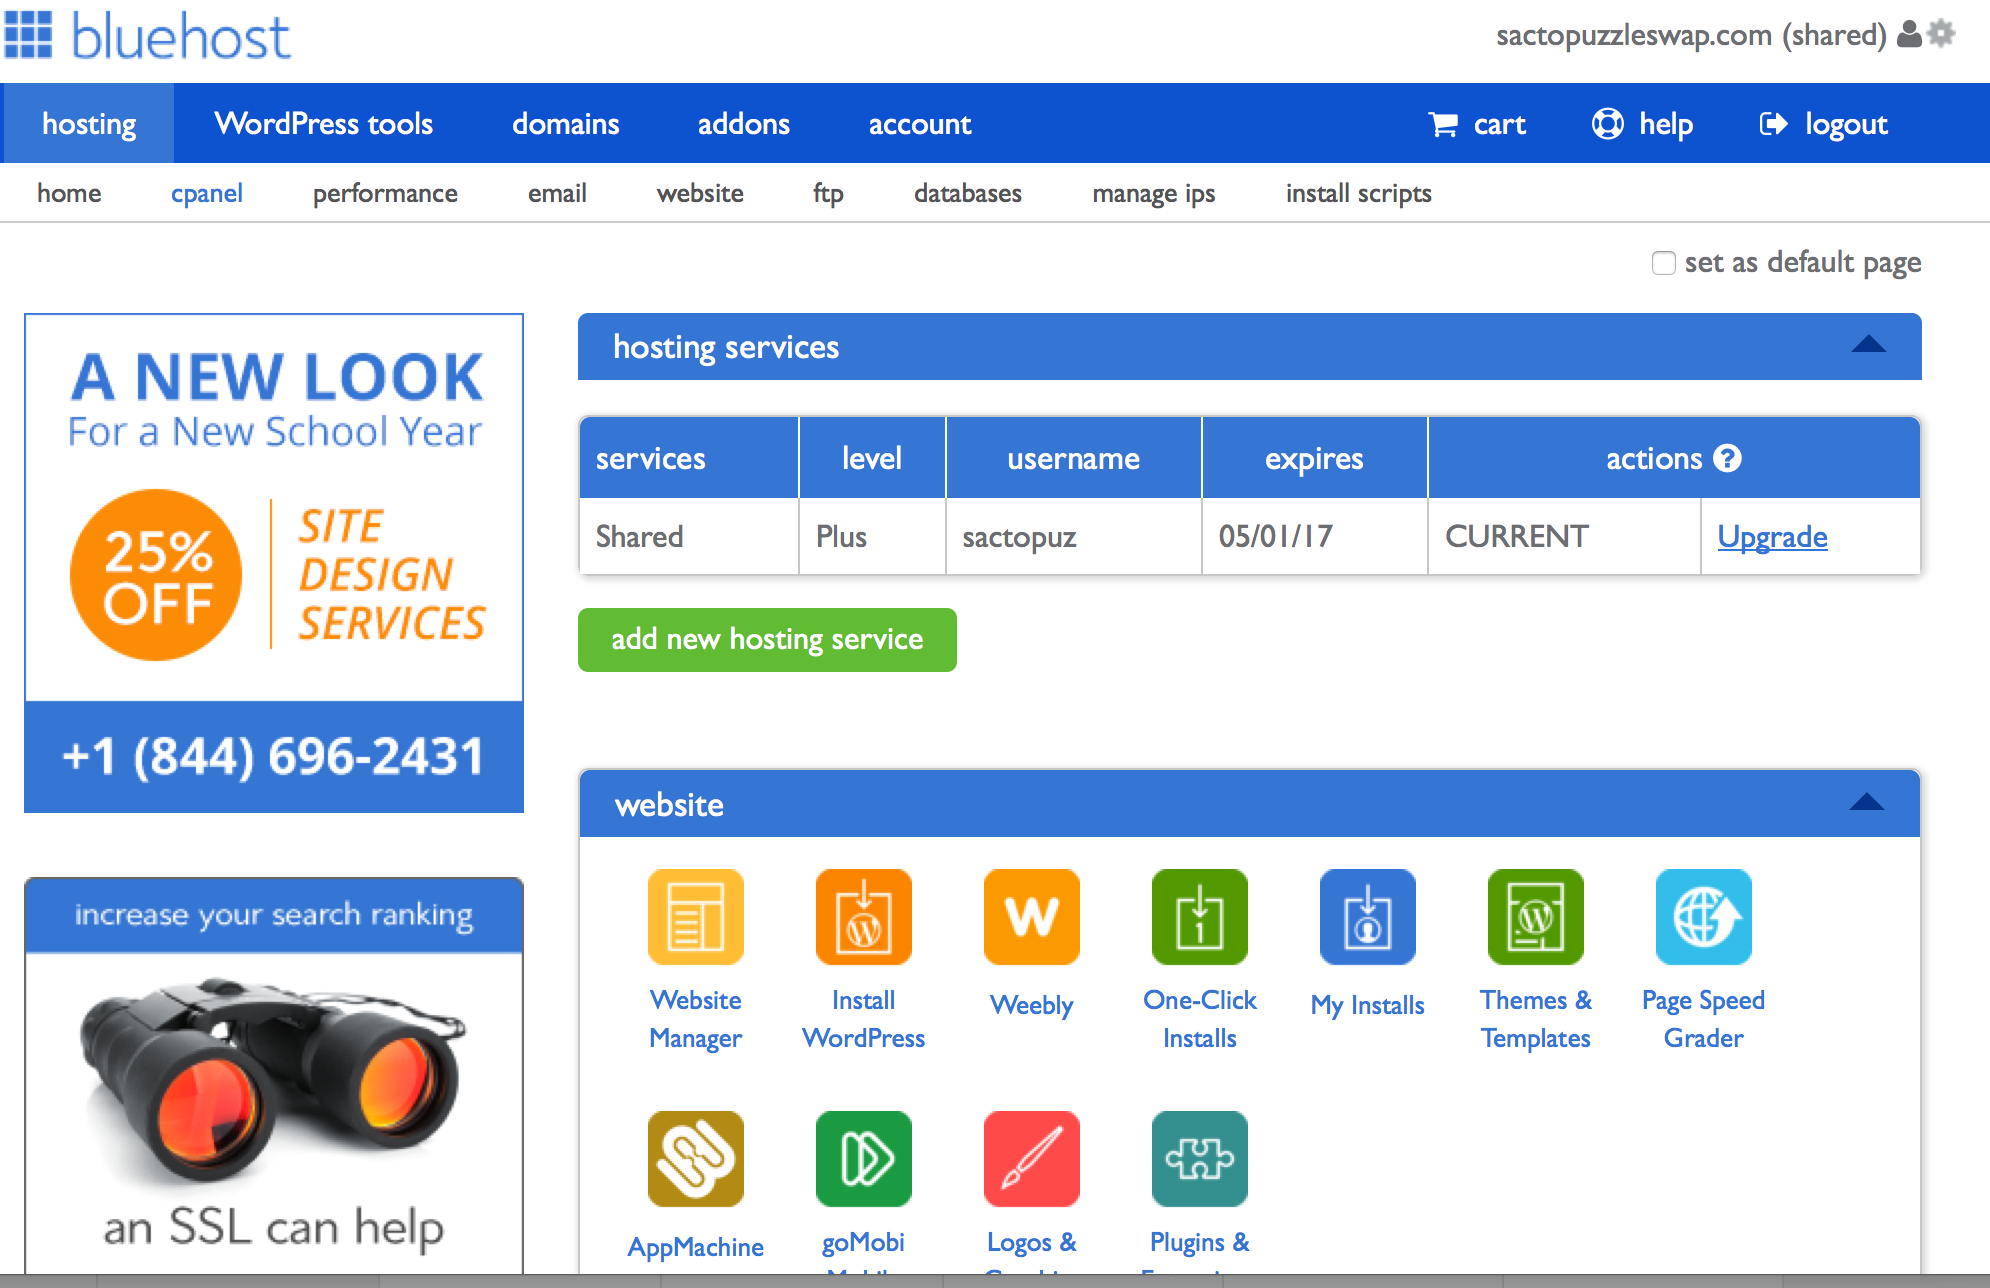
Look for the “website” section and click on “WordPress Install”.

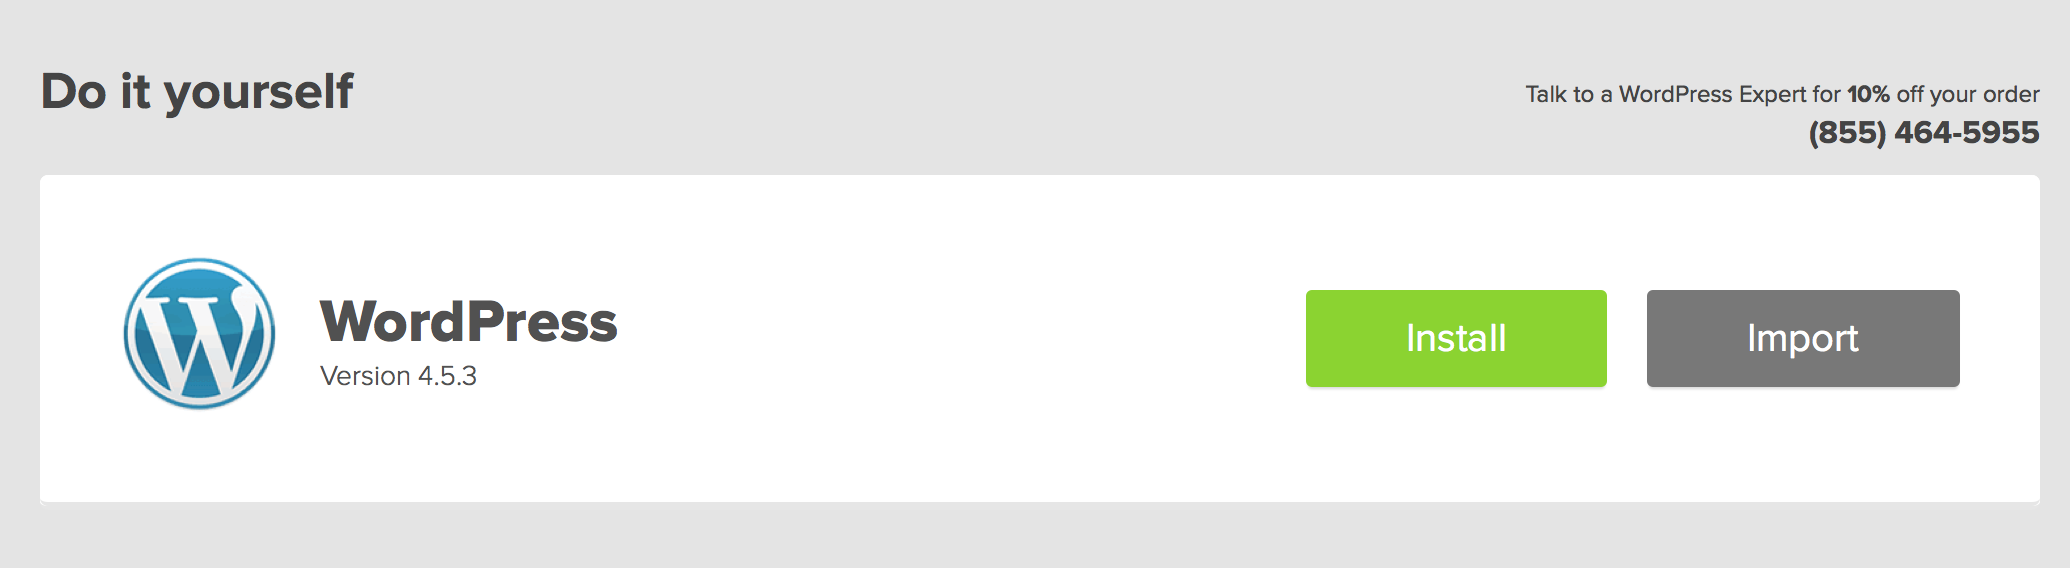
Then click on this install button:
On the next page, ensure the right domain name is filled in and click “check domain”:
 It will then check your domain:
 When it comes back, click on the “Show advanced Options” check box:

It will expand into a form that you can fill out like so:
 Click on the “I have read the terms and conditions blah blah blah…” – does anybody ever read the terms and conditions, I mean really.
Then click on the big green “Install Now” button.
Stare at your screen and wait. You can click on View Details and stare some more, but it will look more or less like this:

And viola! You now have a self-hosted WordPress blog – yay!
So, “now what?”, you may be asking. That’s a good question. I’m glad you asked that.
Here’s my little tutorial entitled: “4 Must-Do’s After Starting A Blog“. It will help you set up your profile, upload a header image for your blog, and show you how to get your first blog post published.
Want a new blog/website, but don’t want to set it up?
You can always hire me to do it for you. Just shoot me an email: at margaret at stickyreaders dot com
Disclaimer: I am a Bluehost affiliate and if you sign up using the links on this page, I do earn a commission, but at NO EXTRA COST TO YOU. So if you’re ready to sign up with Bluehost, go here.